

Care Guide
How to Set Up Your Turntable
Setting up your turntable correctly is important, not only for sound quality, but also to ensure that your records aren’t damaged or worn out too quickly. Luckily we’ve put together a step by step guide that takes you through the most important factors for getting the most out of your favourite records. Bear in mind this guide is written with a Technics 1200 in mind. So maybe you won’t have all the adjustment features at your disposal but all the points below apply regardless of the turntable you own.
Let’s get into it.
Isolation - For a true party proof setup make sure your turntable sits on a stable and sturdy surface that isn’t affected by dancing, jumping or pumping bass from your speakers. Another thing to have in mind is to avoid placing the turntable too close to your speakers, as the tonearm, cartridge and circuit board will pick up any airborne vibrations coming out of them, resulting in feedback and distortion. If you’re particularly energetic dancer or you just like to play really loud, bass heavy music you might want to look into adding some additional isolation. Depending on your preference there’s a whole world of solutions for you to explore. All the way from bespoke isolation feet (like these from isonoe to DIY hacks using concrete blocks and squash balls.

Levelling - Making sure that your turntable is level is very important to avoid tracking issues and excessive wear on your record as well as ensuring good channel balance and low distortion. While it's most important to have the turntable be level at the point where the stylus tracks the record, you will also want to check the platter at a few other points. To get this job done you need to have access to a spirit level or even better a bubble/bullseye level. As you are working with multiple axes at the same time, getting all points on the platter level may take some fiddling around and perhaps some shims might come in handy. When everything is nice and level you are good to move on to the next step.

Connections - Make sure that your turntable is connected with low capacitance cables and that the ground lead is properly connected to your (pre)amplifier to avoid hum or feedback. If you hear any unwanted noise, try to route your cables with as little tension and criss-crossing as possible and make sure that they are well away from power supplies or power strips.
Overhang and cartridge alignment - Getting overhang and alignment right is crucial to proper tracking and minimising distortion in the higher frequencies. However getting it right takes a bit of work and patience so if you’re not the tinkering type we recommend dropping off your turntable at your local hifi dealer. They should be able to align everything up rather quickly and cheaply. If you want to do it yourself here’s how:
Overhang is the distance the stylus goes past the spindle. The correct overhang is determined by the turntable manufacturer, and the standard for Technics is 14mm. On a Technics SL-1200, the distance from the back washer of the headshell/cartridge to the stylus should be 52mm. If you have a cartridge rather than a headshell mounted system like Ortofon Concorde, you don't need to check overhang and alignment as these cartridges come set up from the factory.

If you have a headshell mounted system what you need to do is find and print out a cartridge alignment protractor. These can be found online for free (we like this Baerwald one form alignmentprotractor.com) just make sure it’s printed 100% to scale. THIS IS IMPORTANT!
The site we linked to includes a very thorough step by step guide to setting overhang and alignment, so we recommend you follow that to complete the overhang and alignment process.

Vertical tracking angle (VTA) - The aim for VTA adjustment is to have the stylus of your turntable to track the record at the same angle as it was cut with. For modern stereo records that angle is 20 degrees. Luckily all modern cartridges are already angled correctly from the factory so your focus should be on making sure that the tone arm sits parallel to the record. Put on a medium thickness record and eyeball the tonearm. It should sit completely parallel to the platter. Adjust the big ring at the base of the tonearm labelled: "height adj” if needed and double check with a ruler at each end of the tonearm.

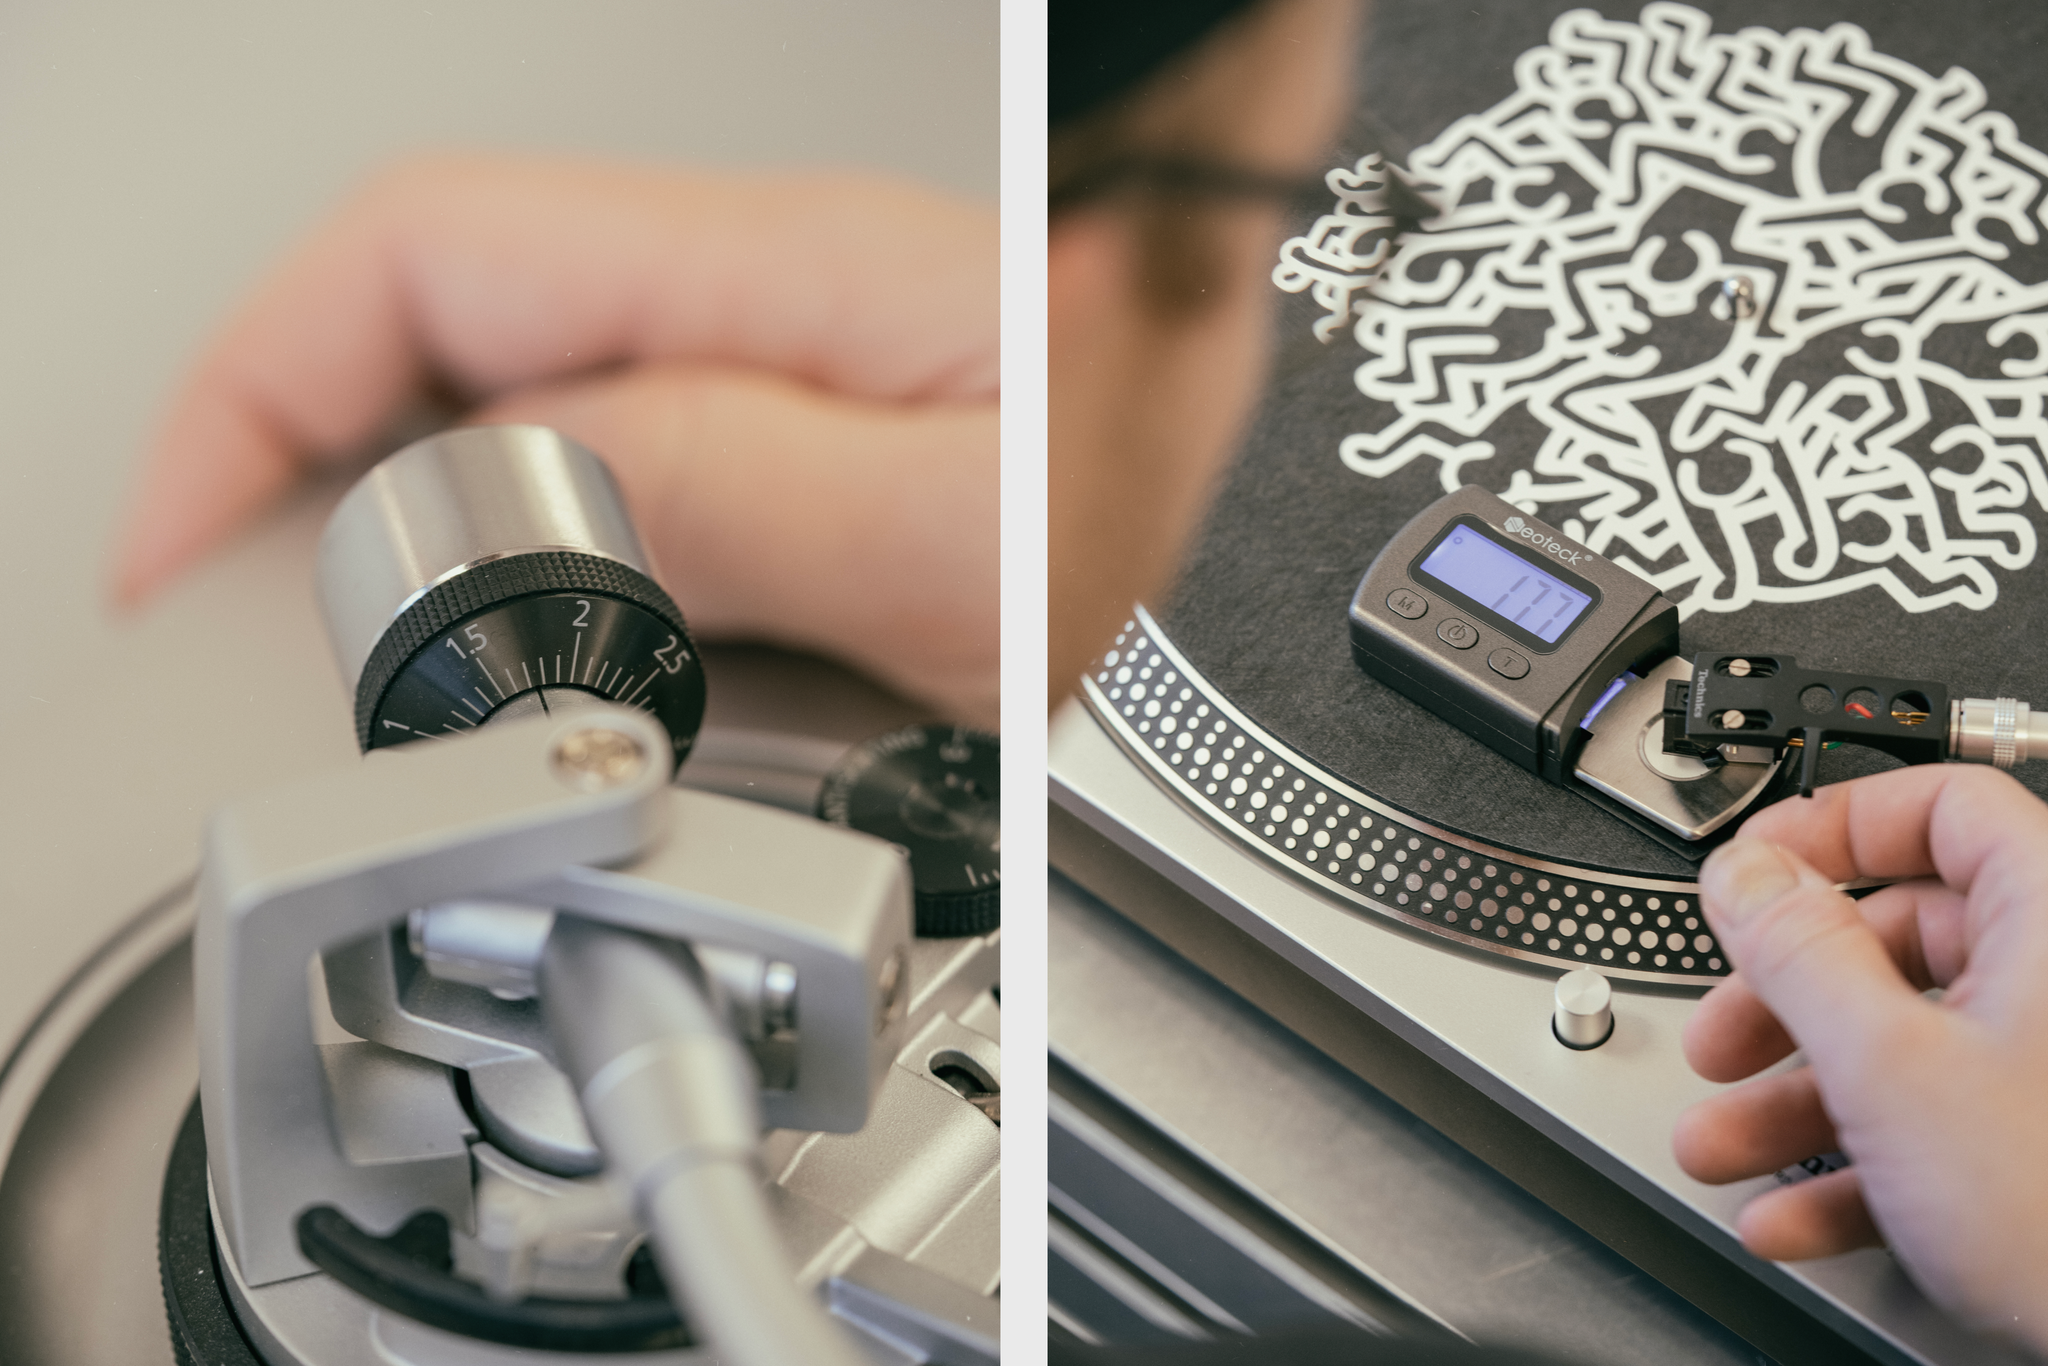
Vertical tracking force (VTF) - Vertical tracking force refers to the force with which the stylus is pressed into the grooves of your record and the counterweight at the base of the tone arm is responsible for generating that force. Because the tiny motor inside the cartridge relies on the right amount of force to generate sound, getting VTF right is important for sound quality and record wear. Too little and you’ll lose bass and potentially damage your records, too much and you’ll end up with a distorted, muffled sound. The correct VTF is determined by your cartridge/headshell manufacturer. You'll find the correct weight in the manual, which usually falls between two and three grams. If you’ve lost the manual for your cartridge a quick search online should in most cases give you the answer.
To calibrate VTF, begin by zeroing out the tone arm. This is done by unlocking the tonearm and placing it over the platter. At this point also dial down the anti skate to zero. Then carefully dial back the counterweight so that the tonearm floats above the platter. From there dial the front ring (the one with numbers on it) to zero, making sure that the actual weight itself doesn’t move. Then turn the weight assembly back in until you reach the VTF number specified by the cartridge manufacturer. Usually the number falls within a range. We recommend aiming for a number at the middle of the range and start from there. Play a record that you know well and use your ears. Are you getting the right amount of bass out of it? Is it tracking properly?
Sometimes the VTF indications on the counterweight aren’t completely accurate, so if you want to get serious about VTF we suggest investing in a digital gauge. These can be had relatively cheaply and make the process both quicker and more precise, especially if you like swapping between different cartridges.
Anti-skate - Anti-skate might be the easiest part of setting up a turntable. It's usually a one-dial control near the base or pivot of the turntable and it will normally have a printed gauge on it. Anti-skate counters the force created by the rotation of the record and platter, which wants to draw the stylus in towards the centre of the record. The rule of thumb is that you set your anti-skate to the same number/weight as your VTF and adjust accordingly. Anti-skate directly relates to proper tracking, so if you set your anti-skate to the same weight as VTF and are still experiencing tracking errors during playback and back cues, then you need to increase the anti-skate.

Congratulations! You’ve done it! Everything should be in order and you should reward yourself with a cold beverage and a few hours to plonk down and listen to your favourite records again on a perfectly calibrated turntable.